
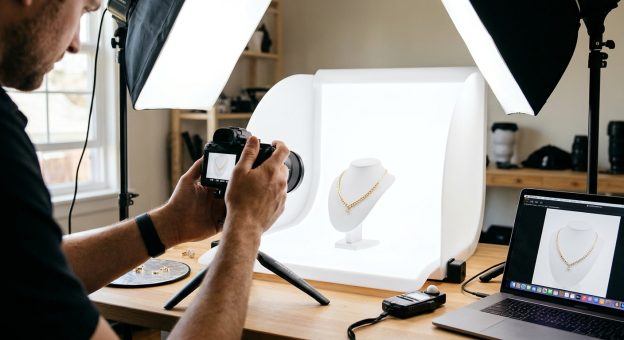
How to Use a White Screen for Better Small Product Photography
A tiny shadow can make a lovely product look dull. A ring loses its detail. A handmade soap bar looks darker on one side than it does in your hand. Before changing your camera settings or buying another light, try placing a white computer or tablet screen beside the product. That familiar rectangle can add a gentle touch of light exactly where your photograph needs it.
The screen works best as a supporting light. It can lift shadows from a nearby window, reveal texture, and create a clean reflection along a shiny edge. The trick is to work close, control its brightness, and watch what happens to the product as you change its position.
Three Things to Get Right
- Place the screen close enough to gently lift the shadow side.
- Keep screen brightness and camera white balance consistent between shots.
- Adjust the screen angle until reflections support the product’s shape.
Understand What a White Screen Can Do
A white screen is a small, relatively weak light source. Unlike white cardboard, which reflects light from somewhere else, a lit display produces its own illumination. That makes it useful when a reflector cannot catch enough light or fit into the right position.
Its softness depends partly on how large it appears from the product’s position. A tablet placed close to a small pendant can act as a broad source relative to that pendant. The same tablet placed across a desk becomes a much smaller apparent source and contributes far less useful light.
Expect subtle changes. A display can brighten the dark side of a small object, but it will struggle against direct sunlight or a powerful studio flash. It suits controlled tabletop setups, especially when the main light comes from a shaded window or a modest continuous lamp.
Build a Simple Setup Around One Main Light
Start with a small product on a plain surface beside a window that receives indirect daylight. Position the window to one side of the product. This creates a brighter side and a shadow side, giving the object visible shape.
Take a photograph before adding the screen. Look for the specific area that needs help. Perhaps a label disappears into shadow, or the underside of a lid looks too heavy. Having a clear target makes placement easier than moving the display around without a purpose.
Place your camera on a tripod or another stable support. Keep the camera position, product position, and exposure fixed while testing the screen. Automatic exposure can darken the whole image when you add light, making the fill effect harder to judge.
Turn off nearby lamps if they create unwanted color or reflections. A simple setup with one main light and one screen is easier to manage than a desk lit by several unrelated sources.
Place the Screen Near the Shadow Side
Begin with the screen on the side opposite the window, facing toward the product. For a small item, a working distance of roughly 10 to 30 centimeters is a useful starting point. This is an experiment, not a fixed rule. Screen size, brightness, product finish, and ambient light all affect the result.
Move the screen closer if the change is barely visible. Move it farther away if the shadow side becomes too bright. Keep enough difference between the two sides to preserve depth. Filling every shadow can make a three-dimensional object look strangely flat.
Height matters too. A screen sitting low on the desk may brighten the base while leaving a tall bottle’s label dark. Raise the device on a secure stand until its illuminated area faces the part of the product you want to brighten.
A slight forward or backward shift can change the result more than a large brightness adjustment. Watch the image as you move the screen, paying attention to lettering, surface texture, and the transition between light and shadow.
Prepare a Plain White Display
Open a White Screen on your computer or tablet to display a plain white surface. Expand it to fill the display, then hide menus and other visible interface elements where possible. A clean white area gives you a more predictable source than a document surrounded by dark toolbars.
Keep practical expectations in mind. Displaying white does not turn a tablet into a studio panel. Its light output remains limited by the hardware, and the effect can disappear under strong room lighting. Bring it close to a small product before deciding that it makes no difference.
Disable automatic brightness, screen dimming, and scheduled warm display modes during the session. These features can change the light between frames. Keep the device awake and use a stable stand that prevents it from sliding into your setup.
Clean obvious fingerprints from the display. Smudges matter most when the screen appears as a reflection in polished metal, glass, or glossy packaging.
Set Brightness by Looking at the Product
Start with a moderately high brightness setting and take a test photograph. Compare it with your original frame. The useful question is whether you can now see the missing detail while the product still has shape.
If the improvement is too weak, bring the screen closer before increasing camera exposure. Raising exposure brightens the entire photograph, including areas that may already be bright enough. Moving the screen changes its contribution more directly.
If the fill looks excessive, reduce brightness or increase distance. On glossy products, lowering brightness also reduces the intensity of the screen’s reflection. Changing its angle may solve that problem more effectively.
Some displays can produce bands or uneven exposure because of their brightness control or refresh behavior interacting with the camera shutter. If you notice stripes, try a slower shutter speed with the camera supported. Test again after changing screen brightness, since display behavior varies between devices.
Keep White Balance Consistent
A display that looks white to your eyes may photograph slightly blue, green, or pink. Your vision adapts to different lighting, while the camera records differences between the window, the screen, and any room lights.
Begin by turning off night modes and other settings that intentionally warm the display. Choose a fixed camera white balance instead of leaving it on automatic for every frame. This helps keep a series of product photographs consistent as you adjust the screen.
For a more controlled starting point, photograph a neutral gray card at the product’s position under the final lighting setup. Use that reference to set custom white balance or adjust the image during editing. Shoot RAW if your camera supports it, giving you more flexibility to refine color later.
A gray card cannot remove every problem caused by mixed lighting. If the window lights one side blue and the screen gives the other side a different tint, one global adjustment may not correct both. Reduce the screen’s contribution, change the main light, or simplify the lighting until the color difference becomes manageable.
Shape Reflections on Glossy Products
With matte objects, you mainly notice the extra illumination. With glossy objects, you may see the screen itself reflected in the surface. That reflection can be useful. A bright rectangular patch can describe the curve of a bottle or define the edge of a metal lid.
Watch the reflection while moving the screen around the product. Small angle changes can shift it away from printed text or a logo. You may need to move the camera slightly as well, since reflections depend on the relationship between the source, surface, and viewing position.
A larger screen placed close to a curved object often creates a broader reflection. Moving it away generally makes the reflected shape smaller and reduces its light contribution. Choose the position that helps explain the product’s form without hiding important details.
If the rectangle looks distracting, rotate the device or move it toward the side. A narrow reflected strip may suit a bottle better than a large bright block. Dark card placed nearby can also create a defined dark edge that separates a shiny product from a pale background.
Match Camera Settings to the Small Amount of Light
For a stationary product, a supported camera lets you use a longer exposure without introducing shake. This is helpful when working with a weak light source. Use a timer or remote release to avoid moving the camera as you take the photograph.
Choose an aperture that keeps the important product details in focus. At close distances, depth of field can be shallow. Check the label, front edge, and any feature the buyer needs to inspect. Avoid assuming that everything is sharp because the preview looks clear at a small size.
Keep ISO low when practical, but judge the finished image rather than chasing a particular number. With a phone, use exposure lock if available and avoid touching the screen between comparison shots. Check bright reflections for lost detail before continuing.
Let a Little Shadow Keep the Product Real
The most useful screen fill often looks almost invisible. You notice readable lettering, a softer shadow, or a clean edge before you notice the lighting itself. That restraint helps a small product feel solid and believable.
Finish by comparing a frame with the screen against one without it. Keep the version that reveals useful detail while preserving texture and shape. Note the device position and brightness if you plan to photograph more items in the same setup.
A white display earns its place through careful positioning. Bring it close, keep its settings steady, and give reflections as much attention as shadows. A small adjustment beside the product can make a meaningful difference in the final photograph.