
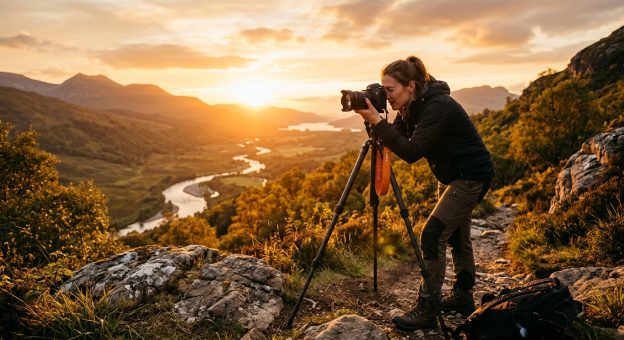
How to Photograph Golden Hour Light for Stunning Outdoor Shots
There is a window of time, just after sunrise and just before sunset, when the world looks like it was lit by a cinematographer. The light goes low and warm, shadows stretch long across the ground, and even the most ordinary scene starts to glow. Photographers chase this window for a reason. But showing up at the right time is only part of it. Getting intentional, repeatable results from golden hour light takes preparation, an understanding of how that light actually behaves, and the discipline to have your settings ready before the magic begins.
Golden Hour Essentials
- Shoot within 30 minutes of sunrise or sunset when the light is warmest and most directional.
- Use a wide aperture and slight underexposure to preserve warm tones without losing highlight detail.
- Place your subject at an angle to the light source, not directly front-lit, to create depth and shadow texture.
Why Golden Hour Light Feels So Different From Midday Sun
The quality of golden hour light is not just a matter of color temperature. It is physics working in your favor. When the sun sits close to the horizon, its rays travel through far more of the atmosphere than they do at noon. That longer path scatters out the shorter blue wavelengths and lets the reds, oranges, and yellows push through. The result is that warm, saturated glow that makes skin tones look extraordinary and turns mundane backgrounds into something painterly.
At midday, the sun is nearly overhead. Light falls straight down, shadows pool directly beneath objects, and everything looks flat and harsh. There is no angle to it, no raking quality that reveals texture. At golden hour, that low sun drags light across the scene horizontally. Every surface, every face, every blade of grass gets a three-dimensional quality that midday light simply cannot produce.
This is why portrait photographers, landscape shooters, and street photographers all converge on the same two daily windows. The physics gives you a head start that no amount of post-processing can fully replicate. You can add warmth in Lightroom, but you cannot manufacture the directionality that comes from a sun sitting four degrees above the horizon.
Camera Settings That Actually Work During Golden Hour
Golden hour light changes fast, sometimes dramatically within a span of ten minutes. Having your settings dialed in before the window opens means you are shooting, not fiddling with menus while the best light of the session passes you by.
Start with aperture. For portraits, f/1.8 to f/2.8 gives you subject separation and lets that warm background light bloom softly behind your subject. For landscapes, f/8 to f/11 keeps foreground and background sharp while still letting color saturate the frame. Shutter speed depends on movement. For static landscape work with a tripod, you can go slow. For portraits or any movement, stay above 1/200s. The softer light at golden hour means you need less speed than you might expect, but do not let that tempt you into slow handheld shots without stabilization.
ISO should start as low as possible, 100 or 200 in most conditions. As the light fades toward the end of the window, you may need to push to 400 or 800, but watch your shadow areas carefully for noise. White balance is where a lot of photographers undercut themselves. If you leave it on Auto, your camera will try to neutralize the warmth it sees. Set it manually to Daylight or Cloudy to preserve those golden tones. Shooting in RAW gives you room to adjust in post, but setting it right in-camera means your preview matches reality, which helps you make smarter decisions in the field.
Recommended Settings by Shooting Scenario
| Scenario | Aperture | Shutter Speed | ISO | White Balance |
|---|---|---|---|---|
| Portrait (still subject) | f/1.8 to f/2.8 | 1/200s or faster | 100 to 200 | Daylight |
| Landscape (tripod) | f/8 to f/11 | 1/30s to 1/125s | 100 | Cloudy |
| Backlit portrait | f/2.0 to f/2.8 | 1/250s or faster | 100 to 400 | Daylight or Manual |
| Action or movement | f/2.8 to f/4 | 1/500s or faster | 200 to 800 | Daylight |
Metering and Exposure for Warm Tones
Expose for the highlights, not the shadows. If you let the camera meter for darker areas, you will blow the sky and lose all that warm detail. Use spot or center-weighted metering and aim for a slight underexposure, around half a stop to a full stop under the camera’s suggested reading. You can recover shadow detail in editing, but blown highlights are gone. This is especially true when the sun itself appears in the frame, which golden hour rewards generously when the exposure is managed carefully.
How to Position Yourself and Your Subject
Light direction shapes the entire mood of the shot. During golden hour, three main positions are available to you: front lighting with the light behind you, backlit with the subject between you and the light source, and side lighting with the sun at roughly 45 to 90 degrees from your subject.
Front lighting is the most forgiving. The subject is fully lit, exposure is predictable, and colors across the frame are saturated. The tradeoff is flatness. It works well for wide landscape shots where you want color saturation from foreground to horizon, but it rarely produces the most compelling portraits.
Side lighting is where golden hour becomes dramatic. Light raking across a face, a sand dune, or a field of tall grass creates texture and dimension that feels almost sculptural. At a 45-degree angle to the sun, cheekbones, jawlines, and surfaces catch the light differently. The shadows they cast give depth that no editing preset can add after the fact.
Backlit shooting is the most demanding but often the most rewarding approach. Placing your subject between you and the sun creates rim lighting, a warm halo around hair and the edges of clothing. If you expose for the subject’s face, the background often goes luminous in a way that feels intentional rather than overexposed. A reflector or a touch of fill flash balances the foreground without killing the mood of the backlight.
How Seasons and Location Shape Your Golden Hour Window
Golden hour does not follow a fixed clock. The duration and quality of the light shift considerably depending on your latitude and the time of year. Near the equator, golden hour is brief and intense. The sun rises and sets almost vertically, which means it passes through that low-angle sweet spot in a matter of minutes. You might have 20 minutes of usable warm light before the sun climbs too high or drops too fast.
At higher latitudes, especially in summer, the sun takes a much shallower arc across the sky. Golden hour can stretch for over an hour. Parts of Scandinavia in midsummer experience a quality of light that barely changes for two to three hours around sunset. In winter at those same latitudes, the sun stays low all day, which means the entire afternoon can carry golden hour characteristics. That is a genuine gift for photographers who do not want to set a 4 a.m. alarm.
The physical environment shapes the color as well. Coastal areas with moisture in the air produce more diffused, pastel-toned golden hours. Desert environments, with dry and dusty air, tend toward intense, saturated oranges and deep reds. Urban environments scatter the light unpredictably, but reflections off glass buildings and the interplay of warm light against cool shadow can produce shots that feel distinctly urban and powerful in their own right.
Planning Your Morning Sessions Around Sunrise Light
Sunrise golden hour is not just a sunset run in reverse. The light in the morning has a crisper, cooler quality before it warms up fully, and the air is typically cleaner. Crowds are thinner. The scene feels uninterrupted. But it demands considerably more preparation, because you need to be on location, composed, and ready before the light begins to shift.
Scouting your location the day before removes a major variable. Walk the space in the afternoon, note where the sun will rise, and identify foreground elements that will catch the first rays. Think about shadows and how they will stretch away from the rising sun. Planning apps help with exact azimuth angles, but nothing replaces standing in the space and seeing how the terrain relates to the horizon.
For photographers serious about timing their morning sessions precisely, a detailed sunrise photography guide can clarify exact light windows for specific dates and locations, and lays out a scouting process that removes guesswork on the morning of the shoot.
Arrive at least 30 minutes before actual sunrise. The sky begins to lighten well before the sun breaks the horizon, and that pre-dawn blue hour light has its own cool, ethereal quality that pairs beautifully with the warm light that follows. Shooting through the transition from blue hour into golden hour is one of the most rewarding sequences in outdoor photography, particularly with long exposures of still water or open sky.
Using Weather to Your Advantage
A perfectly clear sky at golden hour can look stunning, but it sometimes lacks drama. Broken clouds, incoming fronts, or the aftermath of a passing storm can transform a good session into an exceptional one. Light that punches through gaps in cloud cover creates crepuscular rays, those volumetric beams that appear to radiate outward from the sun, and images from those moments are genuinely difficult to reproduce on any other day.
A forecast showing 30 to 50 percent cloud cover often produces the most dynamic golden hour light. The clouds catch the warm light and reflect it back across the sky, turning the entire horizon into a shifting color field. Rain just before sunset frequently leaves the air clean and the atmosphere charged. If you see clearing on the radar in the late afternoon, that is a strong signal to grab your camera and head out.
What Science Tells You About the Color of Golden Hour
The warmth of golden hour light has a precise physical explanation. The phenomenon is called Rayleigh scattering. When sunlight enters the atmosphere, shorter wavelengths, primarily blue and violet, scatter more readily off air molecules. At midday, this is why the sky looks blue. As the sun drops toward the horizon, its light travels through a far thicker cross-section of atmosphere before reaching your lens. By the time that light arrives, most of the blue has scattered away. What remains is concentrated in the warm red and orange end of the spectrum. NASA’s educational resource on how sky color changes explains this process in depth and connects it directly to why atmospheric conditions have such a strong effect on the quality of golden hour light.
Hazy air carries more particles, which scatter even more blue wavelengths. The result is a softer, more diffused golden hour that can look almost watercolor-like in tone. Dust, wildfire smoke, or high humidity all push the palette further toward orange and deep red. If you photograph in an area with regular atmospheric haze, your golden hours will often produce richer color but softer contrast in the distant background. Factor that into your composition choices and lean into it rather than fighting it.
The Light Waits for No One, But It Rewards Those Who Prepare
Golden hour separates photographers who show up from photographers who prepare. The light builds, peaks, and fades in a rhythm that plays out differently every single day. Two sessions at the same location, one week apart, can look completely different depending on cloud cover, seasonal shift, and whatever the atmosphere happens to be doing that morning or evening.
What makes consistently strong golden hour work possible is not talent. It is a repeatable system. Scout the location ahead of time. Know where the light will come from and how it will fall across the scene. Have your settings ready before the window opens. Understand how the season affects your timing and your color palette. And then stay loose enough to react when the light does something unexpected, because it will.
The photographers who produce the strongest golden hour images are not the ones who stumble onto a beautiful sunset and point a camera at it. They are the ones who built the conditions for a great shot before they ever pressed the shutter. The light is the variable you cannot control. Everything else is preparation.