
How to Prepare iPhone Photos for Editing, Printing and Photo Albums
Your favorite iPhone photo can look beautiful on a small screen and still disappoint in a printed album. A face might be slightly blurred. A crop might cut away too many pixels. An upload might fail because the printing service cannot read the file. A little preparation helps you catch these problems before you spend time editing or money ordering prints.
Start with a simple goal: keep your original photos safe, then prepare separate copies for each destination. An editing app, a framed print and an album layout may need different files. You can handle all three without turning your photo library into a confusing pile of duplicates.
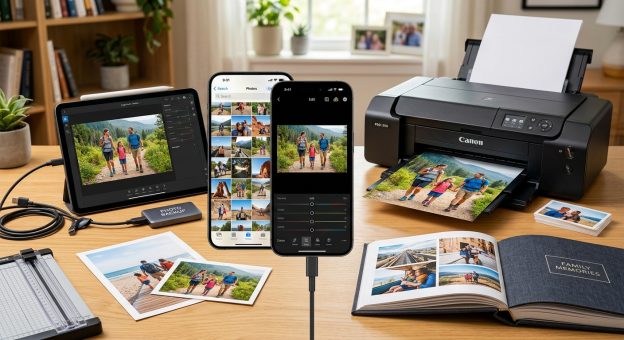
From Camera Roll to Finished Photo: Choose images with clear subjects and enough detail for their intended size. Check pixel dimensions before making tight crops. Keep original files backed up, and create compatible copies for editing or printing. Export at the resolution your destination needs, with a suitable color profile. For albums, judge photos as a sequence as well as individual pictures. Review the final layout and order a test print before committing to a large purchase.
Choose Photos That Hold Up Beyond Your Phone Screen
Begin with selection rather than editing. It is easy to spend twenty minutes fixing a photograph, then notice that a nearby frame has a better expression or sharper eyes. Compare related images first. Pick the strongest version before adjusting exposure, color or composition.
Look at each candidate at a larger viewing size. If possible, use a tablet or computer. Zoom in enough to inspect faces, fine textures and the main subject. A little softness may be acceptable in a small album image. It becomes more noticeable in a full-page portrait or a large framed print.
Pay attention to motion blur, missed focus and heavy noise in dark areas. Editing can improve brightness and color, but it cannot reliably recover detail that was never captured. A smaller print may be a better choice for a meaningful photograph with technical flaws.
For an album, choose photographs that tell a story. Include setting, people, action and small details. Twelve nearly identical portraits can feel repetitive, even if every portrait is attractive. A wider scene followed by a close portrait and a detail shot gives the reader a more varied experience.
Check Pixel Dimensions Before Choosing a Print Size
Resolution begins with the number of pixels in the image. Open the photo information panel in your photo library or editing software and look for dimensions expressed as width by height. File size in megabytes is a separate measurement. A large file does not automatically mean that a photograph contains more usable detail.
Print resolution connects those pixels to a physical size. For a common starting target of 300 pixels per inch, divide each pixel dimension by 300. An image measuring 3000 by 2400 pixels can produce a 10 by 8 inch print at that density. This is a planning guide, not a promise that every image will look sharp.
Viewing distance also affects what looks acceptable. A large wall print viewed across a room may work at a lower pixel density than a small album photograph inspected closely. Follow your printer’s requirements, then judge the actual image quality.
Cropping reduces the pixels available for printing. If you trim a wide photograph down to one person’s face, check the new dimensions afterward. Changing the resolution field to 300 without adding pixels does not create missing detail. Software enlargement adds pixels through interpolation, and results depend on the image and method.
Match the Crop to the Print or Album Space
A photograph’s proportions may differ from the space where you want to place it. A 4 by 6 inch print has a 3:2 aspect ratio. An 8 by 10 inch print has a 4:5 ratio. The same image usually needs a different crop for each shape.
Set the intended aspect ratio in your editor before fine-tuning the composition. This helps you see whether hands, hair, buildings or other details will fall outside the frame. Leave extra room around a subject if the album template has not yet been chosen.
Full-bleed album pages need particular care. The design extends beyond the final trim edge so that cutting does not leave a white border. Keep faces, text and other significant details inside the album provider’s safe area. Avoid placing a face across the center fold of a spread.
Choose a Format Your Next Step Can Read
iPhone photographs can arrive in several formats, depending on capture settings and camera features. HEIF commonly uses the .heic file extension. JPEG commonly uses .jpg or .jpeg. Some photographs may be captured as Apple ProRAW, which uses the DNG format. These files serve different purposes.
Photo Formats for Editing and Printing
| Format | Useful For | Preparation Consideration |
|---|---|---|
| HEIF / HEIC | Keeping efficient original captures and editing in compatible software. | Check whether your editor or printing service accepts it. |
| JPEG | Sharing, print orders and many album uploads. | Export at high quality and avoid repeated compression. |
| DNG / ProRAW | Editing supported captures with greater adjustment flexibility. | Keep the original and export a finished copy for printing. |
| TIFF | Saving a finished image where a workflow requests lossless output. | Files can be large, and upload services may not accept them. |
If your chosen software or printing service requires JPEG, converting HEIF to JPG can help you prepare a compatible copy. Keep the HEIF originals in your library and backup. After conversion, check the copy’s pixel dimensions, orientation and appearance before editing or uploading it.
Conversion changes compatibility. It does not repair blur or increase captured detail. Metadata handling can also vary between conversion tools. Check capture dates if you use them to arrange an album, and review location information before sharing files publicly.
Keep Originals Safe While You Edit
Think of the original as your starting material. Keep it separate from the finished files you send to a printer. That gives you room to change your mind about a crop, create another print size or return to a more natural color treatment later.
A backup should exist beyond the working copy on your phone. Use a separate storage destination and confirm that the files are present and readable. A synchronized library is convenient, but deletions may also synchronize. Know how your chosen system handles recovery.
If your library stores optimized versions locally, allow the full-resolution original to download before exporting. A preview or screenshot is not a substitute for that original. Screenshots may have fewer pixels and can include interface elements or unintended changes in appearance.
For Live Photos, decide which still frame you want to use. Inspect it carefully before printing. Choosing another moment may solve a closed-eye problem, but check that the selected frame has enough detail for your intended output.
Edit With the Printed Result in Mind
Start with exposure and white balance. Aim for believable skin tones and enough detail in highlights and shadows. Then adjust contrast and color with a light touch. Strong saturation may look exciting on a bright display but feel harsh across an album spread.
Your screen brightness can influence editing decisions. A very bright display may encourage you to make the photograph too dark. Work at a comfortable, consistent brightness in reasonably steady room lighting. For demanding print work, a calibrated display gives you a more dependable reference.
Keep related album photographs visually consistent. They do not need identical settings. They should feel as though they belong to the same story. Watch for a portrait that looks much warmer than its neighbors or an indoor scene with unusually heavy contrast.
Apply final sharpening after deciding the output size. Inspect edges and textured areas for bright outlines or brittle-looking detail. Too much sharpening can make skin and noise look rough.
Export Files for Their Destination
Before exporting, read the destination’s file requirements. Check accepted formats, pixel dimensions, maximum file size and color profile guidance. Requirements vary between editing applications, album builders and print services.
For another editing application, transfer the original or the highest-quality file your workflow needs. For printing, export the finished image with its intended adjustments. If you want your crop and color edits to appear in the print, confirm that your export includes them.
Many consumer printing services use sRGB workflows. If the provider requests sRGB, convert your finished copy to that profile and embed it when your software supports doing so. Follow any specific instructions from a specialist lab instead of assuming one setting fits every printer.
JPEG is often a convenient delivery format. Choose a high-quality setting and avoid unnecessary resizing. If a file exceeds an upload limit, check whether the service specifies dimensions before reducing quality heavily.
Transfer files through a method that preserves their intended size. Messaging services may compress attachments. Open a transferred sample and compare its dimensions with the exported file. Use clear filenames that connect each image to its project or album sequence.
Review the Album Before Ordering
An album needs one final check at the layout stage. A photograph that worked beautifully on its own may feel cramped in a template. Review crops, spacing and the rhythm between busy and quiet pages.
- Check every image for resolution warnings in the album builder.
- Inspect faces, hands and text near trim edges and center folds.
- Confirm that captions, dates and names are correct.
- Compare neighboring photographs for distracting color differences.
- Check that the uploaded files include your final edits.
- Order a sample print or proof when available, especially before a costly order.
If the printing service offers automatic image corrections, check whether they suit your edited files. Additional corrections may change the brightness or color you already approved. Make that choice deliberately.
A physical proof helps you judge paper, contrast and detail. View it in ordinary daylight or neutral indoor lighting. If it looks too dark, review both the file and your display settings before changing the entire album.
Give Your Favorite Frames a Lasting Home
Preparing iPhone photographs is a series of small decisions. Choose the right frame. Check its pixels. Make a crop that fits. Keep the original safe and export a copy your destination can use.
Save the finished files alongside the album project or print order details. The next time you want another copy, you will have a reliable starting point. Your photographs can then move from the camera roll into something you can hold, share and return to for years.