
Welcome to Fotoplayer, your friendly guide to turning everyday moments into compelling images. If you are just starting out or you want to improve with the gear you already own, you are in the right place. The best camera in the world cannot save a bad photo if you do not understand light, composition, and a few simple techniques. The good news is that you can become a better photographer using any camera, from a phone to a basic point and shoot or a traditional DSLR. This article walks you through practical, repeatable steps that emphasize fundamentals you can apply today and build on as you grow. Fotoplayer covers photography guides, editing tips, creative techniques, beginner tutorials, best editing software, and album design advice to help you advance.
Getting Started with Any Camera
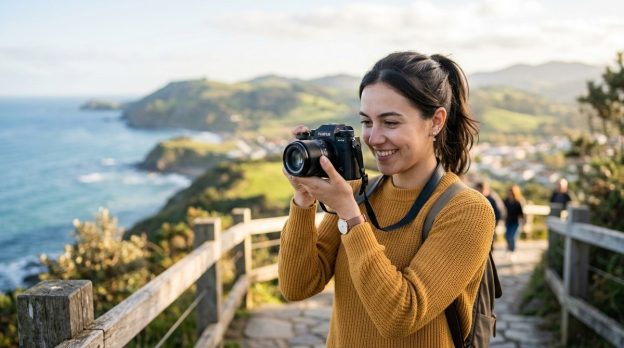
The first step is acknowledging that your camera is a tool not a magic wand. The real magic comes from learning how to see light, craft a composition, and tell a story with your image. You do not need the latest gear to begin. Most successful photos come from steady practice and thoughtful decisions, not from gear upgrades.
The Core: Exposure Triangle
Understanding exposure is the foundation of good photography. Three elements control exposure:
- ISO: sensitivity to light. Start with the lowest ISO you can use for the scene to keep noise down.
- Shutter speed: how long the sensor is exposed to light. Faster speeds freeze motion while slower speeds create motion blur.
- Aperture: the size of the opening in the lens. A wide aperture (low f number) lets in more light and creates a shallower depth of field, making a subject pop against a blurred background.
Practical tips:
– In bright daylight, use a lower ISO (like 100 or 200) and a smaller aperture (higher f number) to keep detail.
– In dim situations, increase ISO but try to keep it as low as possible to avoid grain.
– If you want to isolate a subject against a background, try a wider aperture.
– If you want everything in focus, use a smaller aperture and a bit longer shutter speed when possible.
Light Is Your Greatest Tool
Light shapes mood and detail. The kind of light you have changes everything.
- Golden hour light (early morning and late afternoon) is warm and flattering.
- Midday sun is bright and creates strong shadows; use shade or a diffuser to soften it.
- Backlight can create silhouettes or magical rim light around a subject.
Practical options:
– Move to find better light rather than forcing the camera to do more work.
– Observe how the light falls on your subject and adjust your position to improve shadows and highlights.
– When possible, shoot near a window or use a portable diffuser to soften harsh sun.
Composition That Works
Strong composition helps tell your story. Keep it simple at first and gradually add nuance as you grow.
- Rule of thirds: place important elements along imaginary lines or at their intersections.
- Leading lines: roads, rails, walls guide the viewer into the scene.
- Framing: use elements in the scene to frame the subject.
- Foreground interest: add a detail in the foreground to create depth.
- Negative space: give the subject room to breathe to create a calm image.
Hands on approach:
– Before shooting, glance at the frame and ask what draws your eye first.
– If something seems cluttered, recompose or move to a cleaner angle.
Focus and Clarity
A sharp photo begins with good focus.
- Use single point autofocus for precise focus on a subject.
- For portraits, eye focus is often the most important.
- Consider manual focus for tricky subjects like macro or low contrast scenes.
- In low light, enable focus assist or magnify the view to confirm focus.
Tip: If your camera has a live view magnification feature, use it to nail focus on important details.
Practical Settings You Can Use Today
Even with a basic camera, these basics help you start strong.
- Shoot in RAW when possible for maximum flexibility in post processing.
- Start in aperture priority mode if you want to control depth of field, letting the camera decide shutter speed.
- Use shutter priority when freezing motion or creating movement blur.
- Enable ISO Auto with a sensible ceiling, so the camera adapts to light without you babysitting it.
- Turn on image stabilization if your lens or camera offers it, especially for handheld shooting.
- Use auto white balance as a starting point and fine tune in post if needed.
The Right Lenses for Beginners
A versatile lens often makes learning easier.
- A standard zoom around 24 to 70 millimeters covers most everyday scenes from landscapes to portraits.
- A wider angle is great for environments and architecture.
- A short telephoto helps isolate portraits without stepping too close.
If you are using a kit lens, make the most of the focal range before investing in new glass. Each lens has a character that can influence your photos, but you can still tell stories with any focal length given patience and practice.
Stabilization and Tripods
Stability matters for sharp images and long exposures.
- Use a tripod when shooting low light, long exposures, or want a consistent frame across a series of shots.
- A simple handheld technique can reduce shake: elbows in, stance steady, and breath controlled.
- When you cannot use a tripod, lean on a solid surface or use image stabilization to help.
Shoot with a Plan Not a Button
A little planning goes a long way.
- Set a goal for each shoot such as capturing texture, color harmony, or a dynamic movement.
- Scout the location ahead of time if possible to learn light patterns and angles.
- Make a rough shot list in your notes to stay focused.
Light, Color and White Balance
White balance affects color tone. Shooting in raw allows you to adjust white balance after the fact without degrading image quality.
- Auto white balance is convenient but can shift color unexpectedly.
- Use presets like daylight, cloudy, shade, or tungsten to approximate mood and environment.
- For accurate color in post, shoot a white balance card if you want precise references.
Basic Post Processing for Beginners
Post processing is a companion to shooting. It helps you realize your creative intent.
- Import and organize your photos with a simple folder system.
- Adjust exposure and contrast to reveal detail.
- Tweak color balance to achieve the mood you want.
- Apply a light noise reduction if you shot at higher ISO.
- Sharpen selectively on the subject rather than the entire image.
- Remove minor distractions but keep the image natural looking.
- Save edits as a non destructive workflow and export final versions for web and print.
Step by step quick start:
1) Import and rate your best images.
2) Correct exposure if needed and set white balance.
3) Improve contrast and color with a subtle hand.
4) Apply light sharpening on the subject only.
5) Export a web version and a high resolution version for print.
Backups and Archiving
Protect your growing photo library with a simple system.
- Use at least two storage locations such as an external hard drive and a cloud backup.
- Create a basic folder structure by year, month and shoot.
- Regularly back up new images and keep a small offline archive for convenience.
- Consider versioning for important edits to track changes over time.
The Equipment Budget Mindset
Beginner photography does not require a splurge.
- Start with what you own and make it work. Practice and review your results to reveal what to improve.
- Allocate a small budget for essential upgrades such as a better tripod, a fast lens, or a portable light.
- Avoid over buying gear you do not need. Focus on improving technique first.
Safety, Ethics, and Respect
As a photographer you hold power over subjects and spaces.
- Seek consent when photographing people, especially children.
- Respect private properties and restricted areas.
- Be mindful of sensitive environments and avoid disrupting others.
- Respect local laws and cultural norms while shooting.
Future Considerations: Trends and AI in Photography
The future of photography is evolving with technology while maintaining the art form at its core.
Trends that will Shape Beginner Photography
- Computational photography that blends hardware and software to create more from the same shot.
- Improved sensor performance in mid range cameras offering higher dynamic range.
- More accessible editing tools with guided workflows ideal for beginners.
- Cloud storage and automatic organization making archives easier to manage.
AI and Editing Tools for Beginners
- AI assisted retouching can help with skin smoothing and color balance while preserving natural look.
- Smart suggestions can guide you through composition choices and exposure tweaks.
- Keywords and captions generation can simplify cataloging and sharing.
What This Means for You
- You can achieve professional looking results without advanced editing skills.
- Start with solid fundamentals and use AI tools to accelerate progress, not replace learning.
- Focus on consistent practice and review to build a personal style.
Editing Workflow for Beginners
A well defined workflow saves time and ensures consistency.
- Import and sort: filter for your best images using ratings or quick selects.
- Global adjustments: set exposure, contrast, white balance, and color tone.
- Local adjustments: use selective edits to brighten faces or enhance skies.
- Noise reduction and sharpening: apply thoughtfully to maintain natural texture.
- Print ready and web ready exports: deliver different sizes for the intended medium.
- Backup after editing: keep original and edited files to preserve options.
Practical sequence:
– Always start with a quick crop to improve composition, then adjust exposure and contrast.
– Use color tools to achieve the mood you want rather than over saturating.
– Save a master copy before applying more advanced edits.
Building a Routine: Practice Strategies
Consistency is the secret to improvement.
- Set a simple 15 to 30 minute daily practice plan.
- Alternate between different genres like landscapes, portraits, or street scenes to broaden skills.
- Use themed prompts to keep your practice fresh and fun.
- Review your images shortly after shooting to learn quickly what worked and what did not.
A sample 14 day plan:
– Day 1: Light and shadow study in your home or yard.
– Day 2: Portraits with natural light near a window.
– Day 3: Street photography with quick frames and candid moments.
– Day 4: Texture study in nature or urban details.
– Day 5: Color exploration by photographing a local market.
– Day 6: Reflection and water textures.
– Day 7: Edit and reflect on the best three images.
– Repeat with new subjects or locations for the second week.
Creating a Simple Portfolio and Album Design Basics
A clear, cohesive portfolio helps you show your best work and tell your story.
- Select 12 to 20 favorite images that represent your style.
- Group images into themes such as color, light, or subject matter.
- Keep a clean layout with consistent borders and margins.
- Choose print sizes that balance page design and viewing comfort.
- When designing albums, think about flow, rhythm, and narrative.
Fotoplayer notes: Our guides include beginner tutorials, editing tips, and album design advice to help you present images with confidence.
Common Mistakes and How to Avoid Them
New photographers often repeat a few typical missteps. Here is a quick list with constructive fixes.
- Over editing: keep edits subtle and true to the scene.
- Over reliance on auto settings: learn your camera controls to gain more creative control.
- Ignoring light: spend time learning how light changes throughout the day.
- Cluttered backgrounds: reframe to remove distractions or use depth of field to blur the background.
- Bad framing: step back or crop after shooting to remove unimportant elements.
FAQ
- Do I need a fancy camera to start learning photography?
Not at all. Any camera can deliver great photos with solid fundamentals and consistent practice. - Should I shoot RAW or JPEG as a beginner?
Shoot RAW if you can, it gives you more flexibility in post processing without sacrificing quality. - How do I know when a photo is done?
If it communicates your intended message and feels complete when you look at it, it is done.
Fotoplayer emphasizes practical, beginner friendly guidance that aligns with our mission of helping new photographers learn through guides, editing tips and creative techniques. Remember that photography is a journey you can enjoy with any camera you own. The key is ongoing practice, thoughtful experimentation, and a willingness to learn from each frame you capture. Use this article as a starting point and return to it as you grow. With time, patience, and the right habits, you will find your own voice behind the lens.