
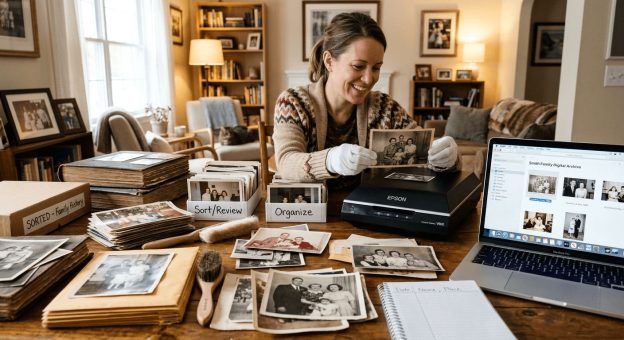
That shoebox in the closet is full of history. Faded birthday parties, blurry summer vacations, and portraits of relatives you barely remember are all in there, slowly deteriorating. If you’re thinking about turning those old family prints into a proper digital photo album or slideshow, the process takes more than running everything through a scanner. Done right, digitizing decades of printed photos is a satisfying project that produces something your family can treasure for generations. But the order in which you do things matters far more than most guides let on.
Start with restoration, not organization. Trying to sort damaged photos before repairing them wastes time and produces a cluttered, inconsistent collection.
– Faded colors and physical scratches need to be addressed before scanning results are worth keeping.
– Grouping photos by decade or event works much better once every image looks its best.
– Bundling finished batches into a single archivable file protects the order you worked hard to create.
Why Restoration Has to Come First
Most people make the same mistake. They scan everything, dump hundreds of JPGs into a folder, and then realize half the images look washed out, yellowed, or scratched. Sorting those images later becomes a chore, because you keep second-guessing which ones are worth keeping and which ones need more work.
The smarter approach is to treat restoration as step one. Before you do anything else, run each print through a proper photo restoration process. This repairs faded tones, removes scratches, and brings color back to images that may have been sitting in a box for thirty or forty years. Once a photo looks good, you know it belongs in your album. And once your entire batch looks good, organizing becomes fast and even enjoyable.
Restoration also helps you spot duplicates and decide which version of a similar shot is worth keeping. When everything is bright, sharp, and properly colored, the best images become obvious immediately.
The Types of Damage You’re Likely to Find
Old prints don’t all age the same way. The damage depends on how they were stored, what kind of paper they were printed on, and how much light they were exposed to over the years. Before you start scanning, take a brief inventory of what you’re working with.
Here’s what commonly turns up in a typical shoebox of old family prints:
- Color fading is the most widespread issue. Prints from the 1970s and 1980s tend to shift toward orange or green over time, losing their natural skin tones and sky blues.
- Surface scratches and dust marks show up clearly once you scan at high resolution. They need to be removed digitally, not masked.
- Yellow or brown staining often comes from acid in the paper or storage materials. It spreads across large areas of the image and can be stubborn to correct manually.
- Silvering out appears on older black-and-white prints as a metallic sheen in dark areas, caused by chemical changes in the emulsion over time.
Knowing what kind of damage you’re dealing with helps you batch similar photos together for processing, which saves time during the restoration phase.
How to Handle the Scanning Stage
Once you’ve assessed your collection, it’s time to scan. Don’t rush this part. Your scanning settings will determine whether the final digital files are archival quality or just passable copies.
- Scan at 600 DPI minimum for standard prints. For smaller prints like wallet-size photos, scan at 1200 DPI so you have enough resolution to enlarge them later without losing detail.
- Use a flatbed scanner rather than a phone camera if possible. Phone apps have improved, but a flatbed produces sharper, more consistent results across a large batch.
- Clean the scanner glass before every session. Dust and fingerprints transfer directly to the scan, adding unnecessary work during the restoration step.
- Save as TIFF or high-quality JPG during the initial scan. You want maximum quality before any processing happens.
- Scan the back of every photo that has handwritten dates or names. That context is often the only clue you have for placing an image correctly in time.
After scanning, run your images through restoration before moving to any sorting or organizing. This order matters more than most guides suggest.
Organizing Your Restored Photos
With every image cleaned up and looking its best, organizing becomes far more satisfying. You’re working with a consistent set of photos now, not a mixed bag of good images and damaged ones.
The most natural way to organize family photos is by era and then by event. Start with the oldest prints and work forward chronologically. Group them into broad decades if you’re not sure of exact dates. Within each decade, create sub-groups for major events like weddings, holidays, and annual family gatherings.
A simple folder structure works well here. Set up a parent folder for each decade, add sub-folders for specific events or family branches within that decade, and use a naming convention that includes the year and a brief descriptor. Something like “1983-Christmas” or “1991-Beach-Trip” tells you exactly what you’re looking at without having to open the file. Consistency in naming saves enormous time later when you’re building the actual slideshow or album.
Packaging Your Collection So It Stays Together
Here’s a step that most digitizing guides skip entirely, and it causes real headaches later. Once you’ve organized your photos into batches, those batches need to be locked in. Folders full of individual JPG files are easy to accidentally reorganize, rename, or partially delete, especially if you’re sharing them with family members who aren’t careful with digital files.
The solution is to convert each finished batch into a single archivable document. A JPG to PDF converter lets you bundle an entire event or decade into one file. That file preserves the exact order of your photos and can be shared with relatives as a single attachment, without any risk of images going missing or getting shuffled around.
PDFs are also far easier to send via email or cloud storage than a folder of 80 individual JPGs. Relatives who aren’t comfortable navigating shared folders can open a single PDF on almost any device. And if you ever want to print a highlights booklet from a particular decade, a PDF is already in the right format.
A good archiving workflow looks like this:
- Complete restoration and quality checks for a batch, then arrange the images in the order you want them to appear.
- Convert the batch to PDF and name the file clearly, something like “Family-1985-1990.pdf.”
- Store the PDF alongside the original scans, not as a replacement for them.
- Keep at least one backup copy in a separate location, whether that’s an external drive, a USB, or cloud storage.
The individual JPGs give you flexibility for future editing. The compiled PDFs give you a shareable, organized version that won’t fall apart.
Preserving the Stories Behind the Photos
Digital copies handle the visual side of preservation. But the metadata, the who, what, where, and when behind each image, needs to be captured while you still have access to people who remember.
Before you finalize your album or slideshow, label every photo you can with names, dates, and locations. Write these into the file’s metadata if your software supports it. Add written captions to the PDF versions. If an older relative can help identify unknown faces or places, schedule that conversation before the album project is complete. Those details disappear when people do.
Following digital preservation standards developed by major archives means maintaining at least two copies of your digitized collection in separate physical locations, along with a documented index of what each folder contains. That advice applies just as well to personal family projects. Hard drives fail. Cloud services change their terms. Having a PDF catalog of your collection stored in a few different places adds a layer of protection that’s easy to overlook when you’re deep in the scanning process.
From the Shoebox to Something Worth Keeping
Old family prints deserve better than slow deterioration in a dark closet. The digitizing process, done in the right order, takes what’s fragile and impermanent and turns it into something that can genuinely last.
Start with restoration so every image is worth keeping. Scan carefully so your digital files are high quality from the start. Organize thoughtfully so the collection makes sense. Package finished batches into PDF documents so the order you created holds. And document the stories behind the photos while you still can.
The result isn’t just a digital album. It’s a record of where your family has been, organized clearly enough that the next generation can actually understand what they’re looking at.