
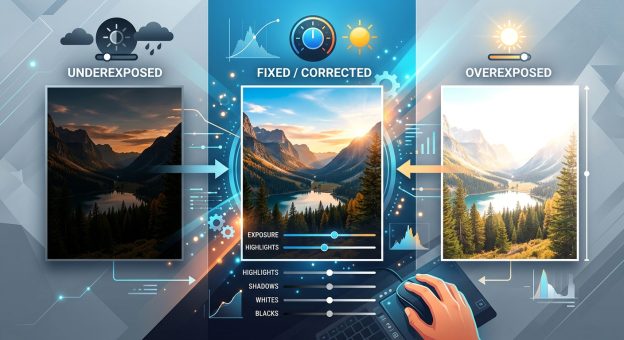
How to Fix Overexposed and Underexposed Photos After the Shot
You pressed the shutter. The moment was perfect. But back on your screen, the sky is blown out, or your subject’s face is swallowed in shadow. It happens to every photographer who works in changing light, and it does not mean the photo is ruined. Exposure mistakes in the field are among the most common and, in many cases, most recoverable issues you will face when you sit down to edit.
What Every Photographer Should Know Before Opening an Editor
- Shooting in RAW gives you significantly more recovery latitude than JPEG, especially for blown highlights
- The histogram tells you exactly what tonal data was captured or lost before you touch a single slider
- Automated one-click tools handle batch corrections quickly when manual editing is not practical
What “Clipped” Means and Why It Changes Everything
Every digital photo is made up of pixels. Each pixel holds a tonal value. When a pixel is pushed all the way to pure white from overexposure, or crushed to pure black from underexposure, it loses the detail that was sitting inside it. That is called clipping.
Clipping is the real enemy, not just bad exposure in general. A photo that is slightly underexposed can look muddy, but lifting the shadows in editing often reveals clean detail underneath. A mildly overexposed sky can still hold texture. Heavy clipping across a wide area is different. That tonal information is gone from the file entirely, and no software can invent data that was never recorded.
This is why understanding the principles behind digital image exposure pays off in the editing room. Camera sensors have a finite dynamic range, measured in stops of light. Most modern sensors handle between 12 and 15 stops. Anything outside that window clips, period. Knowing this helps you set realistic expectations before you start dragging sliders.
Reading the Histogram Before You Edit
The histogram is the single most useful tool in any editing workflow. It shows the distribution of tones in your image from pure black on the left to pure white on the right. The height of the curve at any point tells you how many pixels share that tone.
When the histogram slams hard against the right edge, you have overexposed highlights. When it stacks against the left edge, your shadows are clipped. A spike at either end is a warning. It tells you what was lost before you start guessing.
Get into the habit of checking the histogram first. It takes five seconds and saves you from spending ten minutes trying to recover detail that was never captured. If the spike is modest, recovery is likely. If the spike is massive and fat, manage your expectations early.
Fixing an Overexposed Photo Step by Step
Most editing software, whether you use Lightroom, Capture One, or a free alternative like RawTherapee, follows a similar logic for highlight recovery. The order in which you apply adjustments matters more than most beginners realise.
- Pull the Highlights slider down first. In Lightroom, this targets the upper-mid tones and bright areas without flattening the whole image. Start at minus 50 and watch what comes back in the preview.
- Bring down Whites if the sky or bright surfaces are still blown. The Whites slider handles the very top of the tonal range. Push it into negative territory until texture reappears in the bright areas.
- Adjust the Exposure slider last, not first. Dropping overall exposure early flattens your shadows unnecessarily. Work from the top of the tonal range downward for cleaner results.
- Check the histogram after each adjustment. Watch the right edge pull away from the wall as you work. That gap means you are actively recovering data, not just shifting the overall look.
- Use a graduated or radial filter for sky-specific overexposure. If only a portion of the image is blown, masking keeps your edits targeted and prevents mid-tones from going grey and flat.
RAW vs JPEG: Exposure Recovery at a Glance
| Recovery Scenario | RAW File | JPEG File |
|---|---|---|
| 1 stop overexposed | Full recovery usually possible | Partial recovery, may look flat |
| 2 stops overexposed | Good recovery with careful editing | Limited, clipping visible in bright zones |
| 1 stop underexposed | Clean shadow detail after lift | Some noise appears when lifted |
| 2 stops underexposed | Recoverable with noise reduction applied | Heavy noise, colour banding likely |
| 3 or more stops either direction | Partial recovery, some detail lost | Very limited, visible degradation throughout |
Pulling Detail Back from Deep Shadows
Underexposed photos present a different kind of problem. The data is often still there, just compressed into a narrow band at the bottom of the tonal scale. When you lift the Shadows slider, you are spreading that compressed information back out across a wider range.
The challenge is noise. Shadow regions in digital sensors hold the most noise. Lifting them aggressively can turn a dark, moody portrait into something that looks like it was shot through frosted glass. The fix is to balance your shadow lift with noise reduction applied immediately after.
In Lightroom, open the Detail panel after lifting shadows. Raise Luminance Noise Reduction to somewhere between 20 and 40, then check the image at 100 percent zoom. Sharpening can recover some of the texture you lose to noise reduction. It is a trade-off, but most shots come out looking clean if the underexposure was mild to moderate.
For portraits shot in dim light, the face usually holds up well even after a 2-stop lift from a RAW file. Backgrounds, being further from the subject and often deeper in shadow, will show more noise. Targeted masking lets you treat skin separately from the background, giving each region the right amount of lifting without applying a single global correction that compromises both.
Habits That Make Exposure Problems Harder to Fix
Some shooting decisions stack the odds against recovery before you even open your editor. These are common traps:
- Shooting JPEG only: JPEG applies compression and discards tonal data to keep file sizes small. There is far less information to work with compared to RAW, and clipping appears harsher the moment you push any adjustment slider.
- Trusting the in-camera LCD preview for exposure: The LCD preview is processed and typically brightened by default on most cameras. A shot that looks correct on the back of the camera can be a stop overexposed in the actual file.
- Turning off highlight alerts: Most cameras have a blinking highlight warning that flashes on overexposed areas. Disabling it removes a real-time warning during the shoot.
- Not revisiting exposure settings between scenes: Light shifts constantly during a shoot. Settings that worked inside a venue will blow everything out the moment you step into noon sun.
When Manual Editing Is More Than You Want to Take On
Not every photographer has time to hand-edit every single frame. Wedding photographers, event shooters, and sports photographers come home with hundreds or thousands of images from a single session. Sitting with sliders on each one is simply not realistic when deadlines exist.
This is where automated tools fill a genuine gap in the workflow. Using an image enhancer powered by AI to analyse and correct tonal balance can process a large batch without requiring you to understand every panel in Lightroom or Photoshop. The results are not always perfect for every frame, but for proofing galleries, social media posts, and everyday family photos, they are often more than sufficient.
The approach many working photographers fall back on is a hybrid one. Fix the hero shots manually with full tonal control. Run the rest through a fast automated pass. Spend your limited editing time on the images that will be printed large, shared widely, or delivered as final selects.
How Your File Format Shapes Your Editing Ceiling
RAW files store unprocessed sensor data. That includes all the tonal information the sensor captured, right up to its dynamic range limit. When you open a RAW file in an editor, you are working with the full original data. Nothing has been thrown away yet.
JPEG files are different. The camera applies sharpening, noise reduction, contrast curves, and heavy compression before writing the file. That in-camera processing destroys tonal data in the process. A JPEG that looks fine straight from camera may have no genuine shadow detail left in the dark areas and no texture remaining in the highlights. When you try to correct exposure in a JPEG, you are already working from a degraded starting point.
If your camera supports it, shoot RAW alongside JPEG. Use the JPEG for fast sharing and camera previews. Use the RAW for any frame that deserves proper editing. The difference in recovery capability is significant, as the comparison above shows clearly, and the cost is simply more storage space.
Calibrating Your Screen Before the First Edit
One underrated step in any exposure correction workflow is setting your monitor brightness correctly before you begin. An overly bright monitor makes photos appear less underexposed than they really are. You correct them to look balanced on your screen, share them, then find they look too dark on every other device.
A calibrated display set to a standard brightness, around 100 to 120 candelas per square metre for daytime editing, removes that variable entirely. You do not need a professional colorimeter to get close. Most operating systems have a display calibration assistant built in. Running it takes less than ten minutes and removes a layer of guesswork from every editing session you do afterward.
From Blown Skies to Buried Shadows, Every Shot Deserves a Second Look
No photographer nails exposure perfectly every time. Conditions change faster than camera settings do. A bird lifts from shade into open sky mid-burst. A couple steps from soft indoor light into harsh afternoon sun at the exact moment you press the shutter. These moments cannot wait for manual adjustments. You fire and deal with the light later.
Post-processing exists precisely for this reason. The tools available today are genuinely capable. A photo that looks unusable straight from the camera can often come back to life with careful, deliberate editing. The key is knowing where the recoverable data lives, reading the histogram before reaching for any slider, working the tonal range from highlights down rather than from exposure first, and choosing your file format with recovery in mind long before you ever open the edit panel.
Exposure mistakes are not failures. They are a natural part of shooting in the real world with real, unpredictable light. What you do with them in the editing seat is where the craft carries on.